Don’t think of this recipe as a place to stop; think of it as a place to start! You could use pecans instead of walnuts. If you’d like cranberries instead of raspberries, just add them as soon as you take the apples off the heat so they’ll cook a little. Experiment with spices and toppings. Have fun!
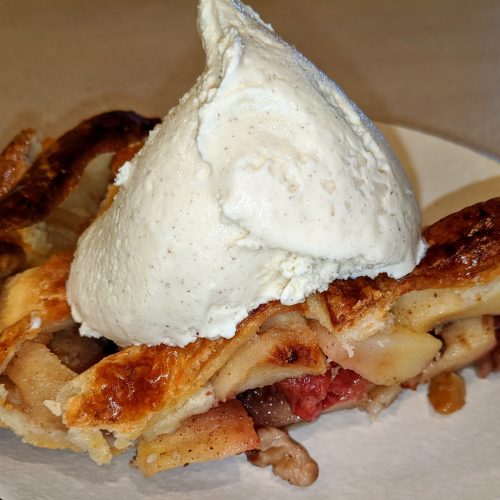
Apple Raspberry Walnut Pie
Everything you love about apple pie, plus crunchy flaky top and bottom crusts, tangy raspberries, crunchy toasted walnuts, and harmonious spices.
Equipment
- Kitchen scale (optional)
- 9-inch pie plate
- Rolling Pin
- Ceramic pie weights (or a bag of red kidney beans)
- Microplane grater
- Colander
Ingredients
Crust
- 2-1/2 cups all-purpose flour 300 grams
- 2 tbsp sugar
- 1/2 tsp salt
- 12 tbsp butter 1-1/2 sticks
- 6 oz cream cheese 3/4 package
- 4 to 6 tbsp COLD heavy cream
- 1/4 cup butter for greasing pan and foil
- 1 large egg for egg wash on top
Filling
- 3 lbs baking apples ask your grocer and try to get local ones that are on sale
- 1 lemon
- 2/3 cup sugar (try brown sugar!)
- 1/4 cup butter
- 1/2 tsp ground cinnamon (or more — be generous!)
- 1/4 tsp ground allspice (optional)
- 1/8 tsp ground cloves (optional)
- 1/4 tsp ground nutmeg (best if you fresh grate a nutmeg and be generous)
- 6 oz raspberries 1 package
- 1/2 cup walnut pieces
Instructions
Bottom Crust
- In a large bowl, measure 2-1/2 cups of all-purpose flour, or weigh out 300 grams.
- Add 2 teaspoons of sugar and 1/2 teaspoon of salt and stir it into the flour.
- Cut butter and cream cheese into pieces and put it into the bowl.
- Using your fingers, work the flour into the fat, breaking it into ever smaller pieces, until it has a texture like grainy corn meal.
- Initially add 4 tablespoons of liquid. Try to drizzle it evenly over the dough.
- Use a soft spatula to fold the mixture repeatedly to get the liquid to stick the grains together without mashing them. Add more liquid as necessary, but no more than absolutely necessary!
- When you think there is enough liquid for the crust to adhere, dump it onto two pieces of wax paper. It’s okay if they aren’t quite exactly the same size; the larger one can be the lower crust.
- Form the dough into two discs. If there’s not enough liquid for the discs to hold together, put everything back into the bowl, break it back into pieces, and add a little more.
- Wrap the discs in wax paper and chill in the refrigerator. Chill at least one hour and up to overnight.
- Preheat oven to 450° with shelf on center rack or one notch lower.
- Get the dough disc for the bottom crust out of the refrigerator and let it come to room temperature.
- Prepare the baking pan with a good coating of butter or shortening.
- Place the disc of dough on a floured piece of wax paper. Flour the rolling pin and your hands.
- Roll the dough out bigger than the pie dish so there will be enough to go over the sides.
- Use the wax paper as support as you gently fold the dough into fourths. Now you can gently pick it up by the folded corner and transfer it to the pan.
- Place the dough in one quadrant of the pie pan and gently unfold it over the pan. Try to press all the air bubbles out as you go. Repair any rips or holes with some of the excess dough. Trim excess dough at the edge of the pie pan. Clean up the edges with your fingers until smooth all around.
- Butter one side of a piece of aluminum foil. Press the foil over the pie crust and smooth it down, wrapping the excess foil over the edges. Add a little more foil if necessary. Fill the foil with ceramic pie weights. Place on a foil-lined baking sheet.
- Bake 18 minutes. Cool at least 15 minutes on a wire rack.
- Remove the pie weights and carefully remove the foil.
- Cool completely on a wire rack.
Filling
- Peel the apples. Cut the apples into quarters with your chef’s knife and then cut the core out of each quarter with your paring knife. Cut each quarter into three slices with your chef’s knife, so there are twelve slices per apple, and put them into a large bowl.
- Zest the lemon and then juice it. I used a microplane to zest it, and juiced it by reaming it with a tablespoon over a strainer.
- Add the lemon zest and juice to the apples, stir to coat, and then add the sugar, and stir to coat.
- Melt the butter over medium-high heat in a dutch oven or skillet. Add the apples and cook about 2 minutes.
- When the sugar dissolves and the juices begin to simmer, cover the pan and turn the heat down to medium low. Cook about 7 minutes until the apples have softened.
- Dump the pan into a colander over a bowl, and catch all the juices. Shake the colander repeatedly to be sure you get it all. Put the juices back into the pan. Cook over medium heat about 10 minutes, stirring frequently to keep it from sticking, especially near the end.
- When the juices are thickened and a little bit carmelized, dump the apples from the colander back into the bowl. Pour the reduced juice over the apples, add the spices, and stir until the apples are coated. Cool completely before proceeding with apples.
- Put the walnuts into a skillet on medium high. Shake the pan often for a few minutes until the walnuts brown just a little bit, and you can smell them. Allow them to cool a bit.
- Rinse the raspberries in the colander and place on a paper towel to drain.
- Once the apples have cooled, gently stir in the walnuts and raspberries. Be careful — raspberries are fragile! Pour the filling into the crust and level with a spatula.
- Preheat oven to 375° F and put the rack in the center.
Lattice-top crust
- Take the top crust from your pie project out of the refrigerator and let it come to room temperature.
- Roll out the top crust as usual, just as you did the bottom crust, just a little larger than the diameter of the pie, on a piece of wax paper. Cut into strips about 1″ wide.
- Lay every other strip across the pie in the same place it would be anyway.
- Roll back all the even-numbered strips a little past halfway, and place the longest remaining strip across the pie at that position. Replace the rolled-back strips.
- Repeat this technique with all the odd-numbered strips, rolling them back a strip’s-width short of the first cross strip. Place the second-longest remaining strip across the pie. Again, replace the rolled-back strips.
- Repeat the above two steps until you get to the edge of the pie, and then turn the pie around and do the same thing on the other side.
- Trim the strips at the edge of the bottom crust with a table knife, collect the trimmed and leftover dough, make it into a disc, flour it, roll the length the diameter of the pie and the width about five inches, and cut it into extra strips.
- Take some of the extra strips and make a ring around the outside of the pie, right at the edge of the pie plate. Turn the plate a full 360° several times as you press the strips down until the edge of the pie is sealed to the bottom crust. Don’t forget to seal the ends of the outer strips together.
- Beat one egg with one tablespoon of cold water.
- Brush the egg wash onto the crust. Be sure to do the horizontal strips, the vertical strips, and the outer ring.
- Place a tiny square of butter over each hole so the pie beneath won’t dry out while baking.
Baking
- Place the pie on a foil-lined baking sheet and put it in the oven. Bake about 50 minutes.
- When the crust is golden brown, remove from the oven. Completely cool on a wire rack before serving.